
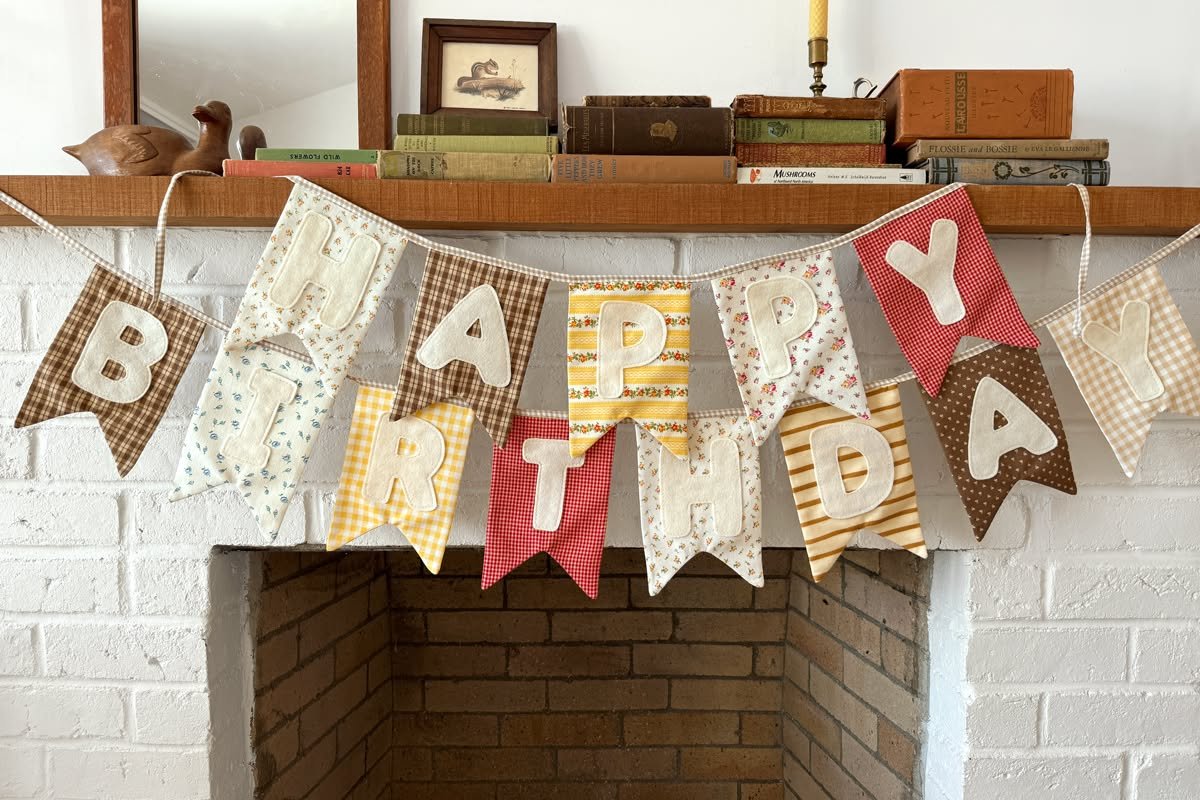
Introduction
A birthday backdrop can turn a plain wall into the main feature of a celebration. It creates a clear space for photographs, highlights the cake table, and helps the entire room feel more coordinated.
You do not need expensive rental equipment or professional decorating skills to make an attractive backdrop. With paper, fabric, photographs, ribbons, lights, and a little planning, you can create a design that suits your space and budget.
These DIY birthday backdrop ideas include colorful designs for children, elegant options for adults, small-room solutions, and reusable decorations for future celebrations.
What Makes a Good Birthday Backdrop?
Before choosing a design, think about four important factors:
1. The Available Space
Measure the wall or area where the backdrop will go. A small design may work better than a full wall in a bedroom or apartment.
2. The Party Theme
Choose colors and materials that match the cake, tableware, invitations, and other decorations.
3. The Photo Area
Leave enough space in front of the backdrop for guests to stand comfortably. Avoid placing furniture where it blocks photographs.
4. The Installation Method
Use suitable removable hanging products where possible. Test the method on a small area first, especially if the wall is painted or rented.
1. Make a Paper Flower Backdrop
Paper flowers are a beautiful way to create a colorful birthday wall.
Use cardstock, crepe paper, or tissue paper to make flowers in different sizes. Arrange larger flowers as the main focal points and use smaller flowers to fill the gaps.
You can attach the flowers to a lightweight board, fabric panel, or suitable removable wall strips. A less crowded arrangement can look more elegant and is easier to store.
2. Create a Crepe Paper Streamer Wall
A streamer wall is one of the quickest DIY backdrop projects.
Materials
- Crepe paper streamers
- Scissors
- Painter’s tape or suitable removable tape
- A measuring tape
- Optional ribbon or a birthday sign
Method
- Choose two or three coordinating colors.
- Measure the height of the backdrop area.
- Cut streamers to a similar length.
- Attach the top of each streamer in vertical rows.
- Alternate the colors across the wall.
- Add a banner or sign in the center.
For a more polished appearance, keep the rows evenly spaced. Streamers can also be twisted slightly to create texture. <Cite refs={[“turn0search2″,”turn0search3”]} />
3. Design a Tissue Paper Tassel Backdrop
Tissue paper tassels add movement and texture to a plain wall.
Make tassels in matching colors and attach them to twine, ribbon, or a lightweight cord. Hang the garland horizontally above the cake table or create several rows for a fuller backdrop.
This design works well for children’s parties, colorful themes, and small celebrations.
4. Use a Plain Fabric Backdrop
Fabric creates a clean background and can be reused for different events.
Choose cotton, linen, muslin, or another suitable fabric. A plain white, cream, beige, or pastel fabric can work with many birthday themes.
To improve the design, add:
- A personalized sign
- Paper flowers
- Fairy lights
- A small garland
- Decorative ribbons
Steam or smooth the fabric before hanging it so wrinkles do not distract from photographs.
5. Create a Photo Memory Backdrop
A photo backdrop is meaningful and easy to personalize.
Print photographs and arrange them in a timeline, grid, heart shape, or collage. You can include pictures from different ages, family celebrations, trips, or memorable moments.
Add small captions or dates beneath selected photographs. Use removable adhesive or display the photos on a board to reduce wall damage.
6. Make a Paper Fan Backdrop
Paper fans or folded paper rosettes can fill a wall without requiring complicated tools.
Use large fans as the main shapes and smaller fans around the edges. Place a birthday message in the center or combine the fans with a few paper flowers.
For a balanced design, leave some visible wall space between groups instead of covering the entire wall.
7. Build a Birthday Fringe Curtain
A fringe curtain can create a festive background with minimal effort.
You can make one from metallic paper strips, tissue paper, or crepe paper. Attach the strips to a strong horizontal line or suitable rod, then hang the curtain behind the cake table or photo area.
Choose one metallic color with a neutral shade for a more refined appearance. Make sure the curtain does not block doors, windows, or walking paths.
8. Create a DIY Birthday Sign Backdrop
A large birthday sign can become the main decoration by itself.
Use cardboard, foam board, thick paper, or a wooden panel. Write a message such as:
- Happy Birthday
- Make a Wish
- Celebrate Today
- Another Wonderful Year
- Birthday Memories
Decorate the sign with paint, paper shapes, ribbon, or small artificial flowers. Place it against a plain fabric backdrop for a simple but effective result.
9. Make a Rainbow Paper Backdrop
A rainbow backdrop can bring color to a children’s birthday party.
Cut paper into arches, circles, clouds, stars, or other shapes. Arrange the pieces in a rainbow pattern on a wall or board.
You can make the design more complete by adding a name, age, or short birthday message. Use consistent spacing so the rainbow shape remains easy to recognize.
10. Create a Minimalist White-and-Gold Backdrop
A minimalist backdrop can look elegant without many decorations.
Use a white or cream fabric background with gold paper letters, a simple sign, and a few metallic accents. Add a small cake table beneath the display.
This style is suitable for adult birthdays, family celebrations, and homes with neutral interior design.
11. Make a Floral Garland Backdrop
A floral garland can be made with fresh, artificial, or dried flowers.
Attach the flowers to a ribbon, twine, or lightweight frame. Hang the garland across the top of the backdrop or place it along one side for an asymmetrical design.
Artificial flowers are useful when you want to reuse the decoration. Keep dried flowers and other delicate materials away from heat sources.
12. Create a Curtain-and-Light Backdrop
Combine a plain curtain with soft LED or fairy lights for a cozy birthday background.
Hang the fabric first, then place the lights in vertical lines or gentle curves. Use battery-operated lights when possible to reduce loose cables.
Keep the lighting cool enough for the materials being used, and do not place fabric or paper near hot bulbs, heaters, or open flames.
13. Make a Birthday Backdrop with Paper Chains
Paper chains are simple, inexpensive, and easy to customize.
Cut colored paper into strips, form loops, and connect the loops into a chain. Use two or three colors that match the birthday theme.
Hang the chain across the wall, around a doorway, or above the cake table. For a modern look, use patterned paper or a single-color palette.
14. Design a DIY Chalkboard Backdrop
A chalkboard-style backdrop can be personalized for almost any birthday.
Use a real chalkboard, a reusable board, or a printed chalkboard-style background. Add the birthday person’s name, age, favorite activities, or a short message.
Keep the design readable by limiting the amount of text. A few simple illustrations can make the backdrop more attractive without making it crowded.
15. Create a Birthday Backdrop with Ribbons
Ribbon streamers can create a soft and colorful wall decoration.
Cut ribbons to equal lengths and attach them to a rod, cord, or suitable horizontal support. Mix different textures, such as satin, cotton, and grosgrain ribbon, if they fit the theme.
For a neat result, use a limited color palette and keep the ribbons at similar lengths.
16. Make a Small Birthday Backdrop for a Bedroom
A bedroom backdrop should be compact and easy to install.
Choose the wall behind the bed, desk, or a small table. Use a banner, a few paper flowers, fairy lights, and a personalized sign.
Avoid placing decorations where they can interfere with fans, electrical equipment, sleeping areas, or movement around the room.
17. Create a Birthday Backdrop with a Paper Number
A large paper or cardboard number can highlight the birthday age.
Cover the number with:
- Colored paper
- Paint
- Paper flowers
- Photos
- Ribbons
- Decorative leaves
Place the number beside the cake table or in the photo area. Make sure it is securely supported and cannot easily fall.
18. Use a Repurposed Sheet as a Backdrop
A clean, plain sheet can become a practical birthday background.
Choose a sheet in a suitable color and smooth it before hanging. Add a handmade banner, paper decorations, or a photo display.
This is a useful option when you need a quick backdrop using materials already available at home.
19. Create a Birthday Backdrop with Hanging Stars
Hanging stars can create a playful or evening-inspired theme.
Cut stars from cardstock, metallic paper, or another lightweight material. Attach them to strings at different lengths and hang them from a suitable support.
You can combine the stars with a dark blue fabric background and small LED lights. Keep the hanging pieces secure and away from fans or areas where guests walk.
20. Make a Dessert Table Backdrop
A dessert table backdrop gives the cake and sweets a dedicated display area.
Start with a plain wall or fabric background. Add a birthday sign, paper fans, flowers, or a small garland. Arrange the cake on a stand and use different heights for cupcakes, cookies, and other desserts.
Keep the table stable and avoid overcrowding the food area with decorations.
21. Create a Reusable Backdrop Panel
If your family celebrates birthdays regularly, consider making a reusable backdrop panel.
You can use a lightweight board, fabric-covered frame, or folding display panel. Decorate it with removable elements so the colors and message can be changed for different celebrations.
Store the panel flat or in a protected area to prevent bending, creasing, or damage.
DIY Birthday Backdrop Ideas for Different Themes
For Children
Use bright paper fans, rainbow shapes, colorful streamers, paper animals, stars, or themed signs.
For Teenagers
Try photo walls, favorite-color designs, fairy lights, minimalist signs, and creative paper decorations.
For Adults
Choose fabric, flowers, neutral colors, metallic accents, elegant lettering, and simple lighting.
For Family Celebrations
Use family photographs, handmade messages, a shared memory timeline, and a comfortable photo area.
How to Make a DIY Birthday Backdrop Look Professional
Use a Limited Color Palette
Two or three main colors usually create a more coordinated result than many unrelated shades.
Create One Focal Point
Choose one main feature, such as a large sign, paper flower arrangement, or photo display.
Add Different Heights
Mix large and small decorations to create depth. Avoid placing everything in one straight line.
Keep the Background Neat
Smooth fabric, trim uneven paper, and remove unnecessary packaging or visible tape.
Plan the Photograph Area
Check the background from the camera’s position before the party begins. Make sure the main sign and decorations are visible.
Use Removable Hanging Methods
When possible, choose methods that suit the wall surface and follow the product’s instructions.
Common DIY Backdrop Mistakes to Avoid
1. Covering the Entire Wall
A completely crowded wall can make photographs look messy. Leave some open space.
2. Choosing Too Many Colors
A simple palette makes the backdrop look intentional.
3. Ignoring the Room’s Size
A large backdrop may overwhelm a small bedroom. Scale the design to the available space.
4. Using Weak Supports
Make sure the rod, cord, board, or hanging method can support the decorations.
5. Blocking Doors and Windows
Keep entrances, exits, windows, and ventilation areas clear.
6. Placing Materials Near Heat
Keep paper, fabric, dried flowers, and ribbons away from candles, heaters, hot bulbs, and open flames.
7. Forgetting the Floor Area
Secure any material that reaches the floor so it does not become a tripping hazard.
DIY Birthday Backdrop Checklist
- Measure the backdrop area.
- Choose a theme and color palette.
- Decide on one main focal point.
- Gather paper, fabric, lights, or other materials.
- Test the hanging method.
- Prepare the backdrop before the party.
- Check the design from the photo-taking position.
- Keep walkways and exits clear.
- Secure all hanging decorations.
- Plan how to store or recycle the materials afterward.
Frequently Asked Questions
What is the easiest DIY birthday backdrop?
A fabric backdrop with a birthday banner is one of the easiest options. You can also create a quick streamer wall using crepe paper and suitable removable tape.
How can I make a birthday backdrop on a low budget?
Use materials you already have, such as sheets, cardboard, paper, ribbons, photographs, and fairy lights. Focus on one wall instead of decorating the entire room.
Can I make a birthday backdrop without balloons?
Yes. Paper flowers, streamers, fabric, paper fans, photo displays, flowers, ribbons, and handmade signs can create attractive balloon-free backdrops.
What is the best backdrop for a small room?
A compact design on one wall is usually best. Try a fabric panel, photo collage, small paper flower arrangement, or personalized banner.
How far in advance should I make a DIY birthday backdrop?
Simple designs can be made on the same day, but paper flowers, photo collages, and detailed handmade decorations are easier to prepare one or more days in advance.
Final Thoughts
The best DIY birthday backdrop ideas combine creativity, planning, and materials that suit the available space. You can create a beautiful celebration wall with paper flowers, fabric, streamers, photographs, fairy lights, or a handmade sign without spending a large amount of money.
Choose one main focal point, keep the colors coordinated, and make sure the backdrop is secure and practical. A thoughtful DIY design can make the birthday room feel more personal while providing a memorable background for photographs.