
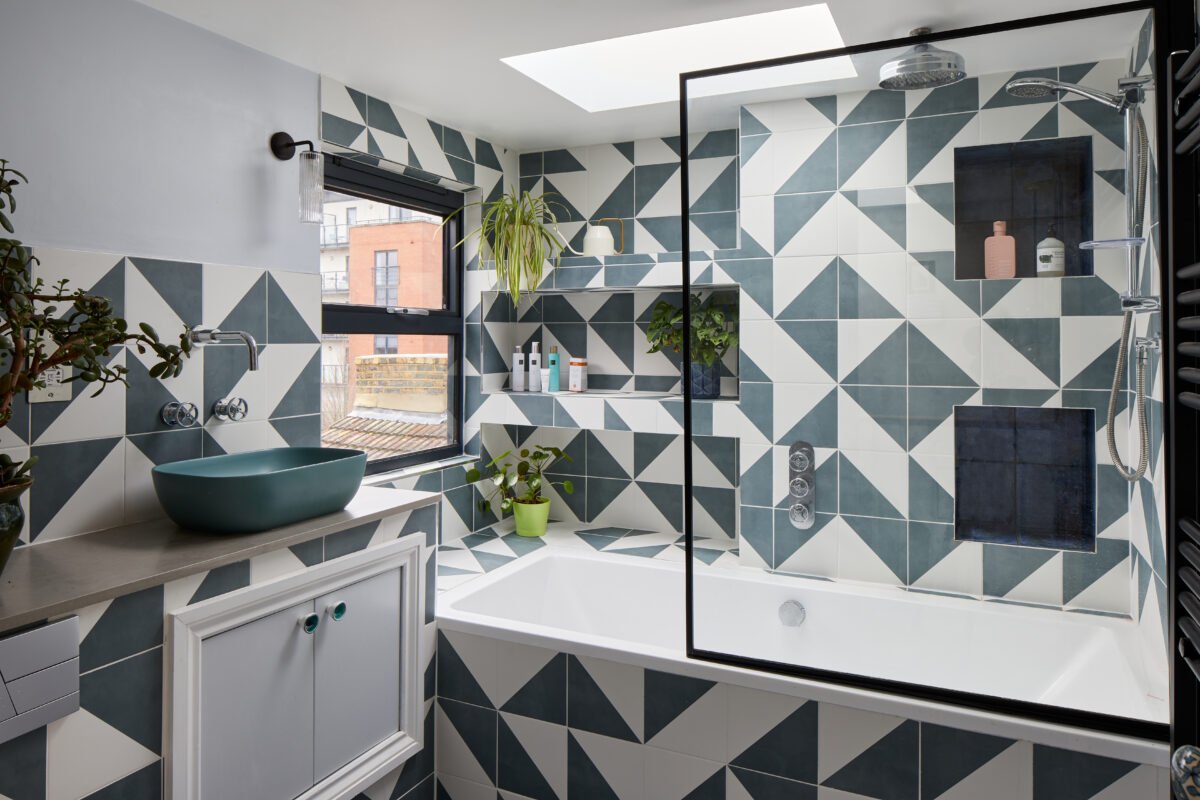
A diamond bath strategy leverages four-sided angled shapes—whether through diamond-shaped ceramic tiles, chevron tile arrangements, or angular freestanding bathtubs—to change how a bathroom feels visually.
Bathrooms present unique design challenges: they are often small, boxy, and dominated by hard right angles. Standard square tiles and traditional rectangular layouts can make narrow powder rooms or compact full baths feel restrictive. Diamond patterns introduce diagonal lines, which guide the human eye outward toward the corners of the room rather than stopping at the walls. This visual shift creates an illusion of width, depth, and intentional architecture.
Whether you are planning a full renovation or looking to update an existing floor or feature wall, here is a practical guide to designing, installing, and maintaining diamond motifs in the bathroom.
Understanding Diamond Design Options in the Bathroom
When incorporating diamond shapes into a bathroom layout, you generally choose between structural elements and surface treatments. Understanding where to apply each determines the balance of the space.
| Application Type | Primary Design Impact | Best Room Size | Difficulty & Cost |
| Diamond Tile Floors (45-Degree Grid) | Widens floor space; breaks up square room dimensions | Small to Large Bathrooms | Moderate; requires precise edge cuts |
| Diamond Mosaic Accent Walls | Creates a focal point behind vanity or shower | Powder Rooms & En-Suites | Low to Moderate (sheet-mounted mosaics) |
| Chevron / Rhombus Tile Systems | Adds 3D visual depth and sophisticated texture | Medium to Large Bathrooms | High; requires meticulous layout planning |
| Angular / Diamond-Cut Freestanding Tubs | Acts as an architectural center-piece | Spacious Master Baths | High; investment fixture with plumbing considerations |
1. Diamond Floor Tile Patterns: Expanding Visual Floor Space
The most functional application of a diamond bath motif is on the floor. Running standard square tiles straight across a bathroom emphasizes parallel walls, which can highlight a lack of width.
Rotating tiles to a 45-degree angle transforms square tiles into a diamond grid, creating an expansive effect.
Straight Grid (Emphasizes Narrow Walls)       Diamond Grid (Expands Sightlines)

+---+---+---+---+                              /\  /\  /\  /\
|   |   |   |   |                             /  \/  \/  \/  \
+---+---+---+---+                            /   /\  /\  /\   \
|   |   |   |   |                            \  /  \/  \/  \  /
+---+---+---+---+                             \/  /\  /\  /\  \/
Choosing the Right Scale
-
Large-Format Diamond Tiles (12×12 inches or larger): Best for medium-to-large bathrooms. Larger tiles mean fewer grout lines, resulting in a clean, uncluttered visual plane that makes small-to-midsize rooms feel less busy.
-
Small Diamond Mosaics (1-to-2-inch sheets): Ideal for shower pans and small powder room floors. The increased density of grout lines improves foot traction in wet zones while adding subtle architectural interest.
Contrast and Color Pairing
-
High Contrast (Black and White): A classic checkerboard pattern laid on the diagonal creates a bold, retro-modern look. It works best when surrounding walls and vanities remain relatively neutral.
-
Low Contrast (Tone-on-Tone): Using soft greys, warm beiges, or subtle marble veining in a diamond pattern offers texture and motion without overpowering the room’s color scheme.
2. Diamond Wall Patterns and Backsplashes
Using diamond shapes on vertical surfaces allows you to direct sightlines upwards or create targeted focal points.
Behind the Vanity
A diamond-patterned backsplash running from the countertop to the ceiling behind the mirror draws the eye vertical, making low ceilings feel higher.
To prevent visual clutter around the mirror:
-
Use monochromatic grout that matches the primary tile color.
-
Keep mirror frames simple—thin metal or frameless designs pair best with patterned tile backsplashes.
Accent Walls in the Shower
In an enclosed or glass-front shower, a diamond-patterned back wall adds depth.
-
Rhombus (3D-Effect) Tiles: These tiles use three distinct shades of the same color arranged in a diamond matrix to give the flat wall an illusion of three-dimensional depth.
-
Vertical Diamond Orientation: Setting elongated diamond tiles vertically stretches the height of the shower enclosure, softening the tight box shape typical of standard bath stalls.
3. Angular and Diamond-Cut Bathtubs
For spacious master bathrooms, a freestanding bathtub featuring geometric, faceted exterior walls—often described as a diamond-cut or angular tub—serves as the primary focal point of the room.
+-------------------------------------------------------+
|                 [ Geometric Vanity ]                  |
|                                                       |
|   +-----------------------------------------------+   |
|   |        Angular / Diamond-Cut Tub              |   |
|   |    \                                     /    |   |
|   |     \___________________________________/     |   |
|   +-----------------------------------------------+   |
|                                                       |
|               [ Glass-Enclosed Shower ]               |
+-------------------------------------------------------+
        Sample Master Bath Layout with Centerline Tub
Layout Considerations
-
Clearance Space: Allow a minimum of 18 to 24 inches of open floor space around all sides of an angular tub. Because the faceted sides catch light differently than smooth, rounded tubs, crowding it against a wall compromises its visual effect and makes cleaning difficult.
-
Lighting Interaction: Place overhead spotlights or pendant lights slightly off-center from an angular tub so the light hits the faceted sides at angles, highlighting the geometric design.
-
Plumbing Alignment: Freestanding angular tubs often require floor-mounted tub fillers. Ensure plumbing rough-ins are positioned accurately relative to the tub’s geometric footprint before closing up subfloors.
Practical Installation & Layout Guidelines
Installing diagonal or diamond-patterned materials requires deliberate planning to avoid common aesthetic and structural mistakes.
1. Plan for Higher Tile Waste
When laying square tiles in a straight grid, tile waste (from cuts) is typically 10%. When laying tiles on a 45-degree diamond angle, tile waste increases to 15%–20% due to diagonal cuts required along every wall and baseboard perimeter.
2. Establish a Center Focal Line
Never start tiling a diamond pattern from one side wall to the other. Unaligned walls will cause the pattern to look crooked.
-
Measure and mark the exact center line of the room (e.g., from the main doorway to the back wall or vanity).
-
Lay the first line of diamond tiles precisely along this centerline.
-
Work outward toward the walls so that border cuts are symmetrical on both the left and right sides.
3. Grout Selection
-
Matching Grout: Softens the pattern, giving the surface a rich, textured surface feel without dominant lines.
-
Contrasting Grout: Highlights every angle and diamond geometric shape. Use contrasting grout only if tile cuts are executed cleanly and floor lines are square.
Maintenance and Long-Term Care
Because diamond tile layouts feature more diagonal cuts and edge lines than straight layouts, maintaining them requires standard care procedures focused on longevity:
-
Sealing Perimeter Grout: Diagonal cuts along walls often touch baseboards or wet thresholds. Ensure perimeter expansion joints are sealed with flexible, water-resistant silicone sealant rather than stiff grout to prevent cracking as the structure shifts naturally.
-
Maintaining Faceted Tubs: Acrylic or solid-surface diamond-cut tubs feature sharp ridge points on their exterior. Clean these edges using non-abrasive micro-fiber cloths and neutral pH cleaners to prevent dulling the finish along the raised facets.